

Use one plan change flow for upgrades and downgrades. The panel determines the change type from the current plan and the selected plan.

Before You Change A Plan

Both Admin and Staff broker users can submit a plan change. The plan order is:
  1. Basic VPS
  2. Standard VPS
  3. Professional VPS
  4. Dedicated Server
A move to a higher plan is an upgrade. A move to a lower plan is a downgrade.

Open The Plan Change Dialog

Use Service Actions: Change Service Plan dialog with the plan selector expanded
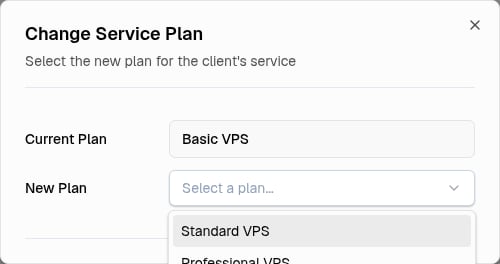
  1. Select Services in the sidebar.
  2. Find the service in Client Services.
  3. Select Manage.
  4. Find Plan Management in Service Actions.
  5. Select Upgrade/Downgrade Plan.
You can also start from the specifications dialog:
  1. Select View Specifications in Service Actions.
  2. Select Upgrade Service.
Both entry points open Change Service Plan.

Select And Submit The New Plan

  1. Check Current Plan.
  2. Open New Plan.
  3. Select the required plan.
  4. Select Confirm Plan Change.
  5. Wait for the confirmation message.
The New Plan list shows the other plans in the plan order. It does not show the current plan. The panel creates a service request with the Upgrade or Downgrade type. The request starts as Pending. The panel then accepts the plan change for background processing. If the same target plan already has a Pending or Processing request for the service, the panel reuses that request. Do not submit the same change again.

Track The Request

Use either location:
  • Open the service and expand Service Request History.
  • Select Service Requests in the sidebar.
Filter Service Requests by Upgrade or Downgrade when required. Select View to open Request Details. A normal plan change from the service page does not require a separate broker approval. The request changes to Approved after the system confirms and completes the plan change.
Last modified on August 2, 2026